
The bottom bracket (also called the bottom fixture) is the heavy-gauge steel component at the bottom corners of your garage door where the lifting cables attach. It carries the full tension of your spring system at all times, making it the single most dangerous component on a residential garage door to attempt to repair yourself. If your bottom bracket shows cracks, bending, or corrosion, do not attempt to remove or adjust it. Call Advanced Door at (844) 971-3667 for safe, professional replacement anywhere in Utah. We are family owned since 1994, the only company in Utah offering a lifetime warranty on parts and labor, and we provide same-day service with free estimates.
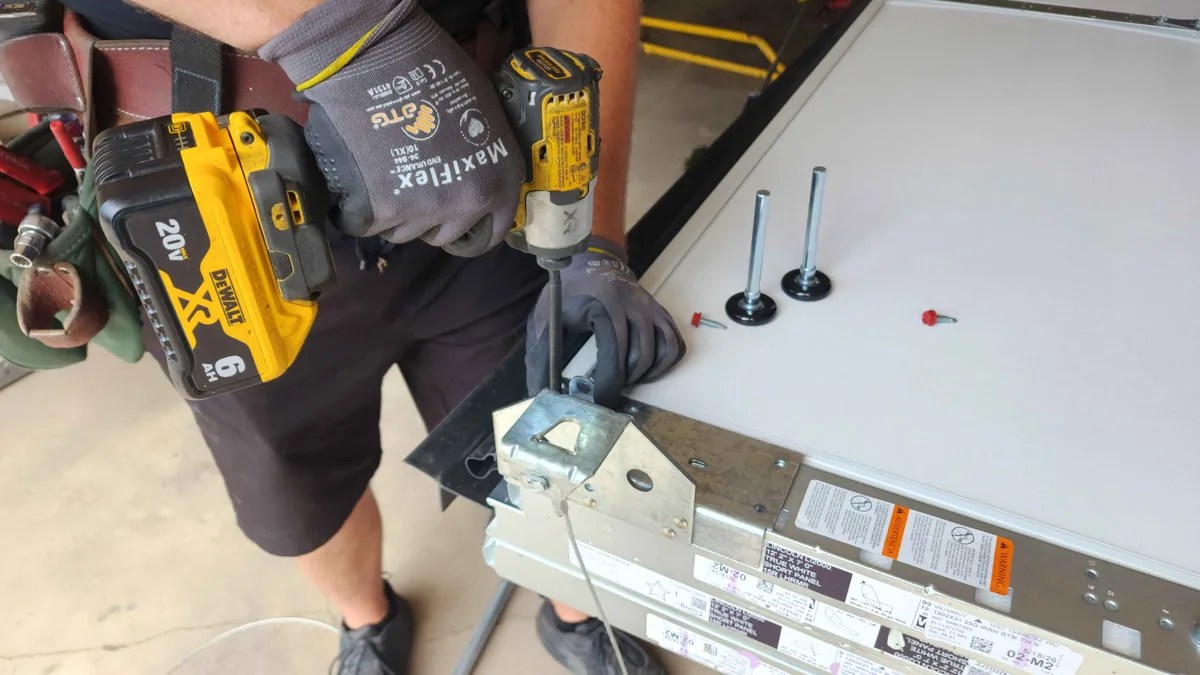
Last updated: August 2026
If you have ever crouched down and looked at the bottom corners of your garage door, you have seen your bottom brackets. They are the heavy metal fixtures at each lower corner where the lifting cables attach to the door itself. On most residential doors, the bottom bracket also holds the bottom roller that rides in the track.
Bottom brackets look simple and harmless. That is precisely what makes them so dangerous. Unlike torsion springs or cables that are obviously under tension, bottom brackets appear to be ordinary pieces of hardware bolted to a door. But behind that mundane appearance lies hundreds of pounds of stored spring energy, and attempting to unbolt a bottom bracket without proper training has caused some of the most catastrophic garage door injuries on record.
This guide covers everything Utah homeowners need to know about bottom brackets: what they are, how they work within your spring and cable system, signs of failure, why you should never attempt a DIY repair, what professional replacement costs, and how Utah’s climate accelerates bracket deterioration. If you suspect a bottom bracket problem, skip the research and call (844) 971-3667 for a free inspection.
Table of Contents
- What Is a Garage Door Bottom Bracket?
- Why Bottom Brackets Are the Most Dangerous Part on Your Door
- Types of Bottom Brackets
- How Bottom Brackets Work With Your Spring and Cable System
- Signs Your Bottom Bracket Needs Replacement
- Common Bottom Bracket Problems
- Why You Should Never Attempt DIY Bottom Bracket Repair
- How a Professional Replaces a Bottom Bracket
- How Much Does Bottom Bracket Replacement Cost in Utah?
- Bottom Bracket Materials and Quality Differences
- How Utah’s Climate Affects Your Bottom Brackets
- When a Bad Bracket Means Bigger Problems
- Preventive Maintenance and Inspection Tips
- 7 Common Mistakes Homeowners Make About Bottom Brackets
- When to Call a Pro
- Frequently Asked Questions
What Is a Garage Door Bottom Bracket?
A garage door bottom bracket (also called a bottom fixture, bottom corner bracket, or cable attachment bracket) is a heavy-gauge steel fixture mounted to the bottom panel of your garage door, one on each side. These brackets serve two critical functions:
Cable attachment point. The lifting cables run from the cable drums on the torsion bar down to the bottom brackets. The cables connect to these brackets via a cable pin, clevis pin, or S-hook, creating the direct mechanical link between the spring system and the door panel.
Bottom roller holder. On most residential doors, the bottom bracket also holds the bottom roller that rides in the vertical section of the track. This combined design means the bracket handles both the lifting force and guides the door at the bottom of its travel.
The bottom bracket is fundamentally different from the brackets and hinges further up the door. Those upper components simply hold rollers and connect panels together. Only the bottom brackets carry the cable load, which makes them the highest-stress, highest-danger component at the bottom of the door.
On a standard residential garage door, each bottom bracket handles approximately half of the total spring tension. For a typical 150-pound door with properly tensioned springs, each bottom bracket and its attached cable are under roughly 75 to 100+ pounds of constant force, even when the door is fully closed. When the door moves, the force dynamics shift, but the cables and brackets remain loaded throughout the entire cycle.
SAFETY WARNING
Bottom brackets are under full cable tension 24 hours a day, 7 days a week. There is no safe position for the door where the brackets become tension-free unless the springs are fully unwound first by a trained technician using specialized winding bars. Never attempt to unbolt, adjust, or remove a bottom bracket yourself. Call (844) 971-3667 for professional service.
Why Bottom Brackets Are the Most Dangerous Part on Your Door
You might assume that torsion springs or cables are the most dangerous components on a garage door. They are extremely dangerous. But bottom brackets present a unique and often underestimated hazard for one simple reason: people do not realize they are dangerous.
They look like ordinary hardware. Springs are obviously under tension. You can see the coils, the winding cone, the torque. Cables are clearly taut. But a bottom bracket looks like any other piece of metal bolted to a door. Homeowners routinely attempt to unbolt them without understanding that those bolts are the only thing preventing stored spring energy from releasing violently.
They are at floor level. When you work on a bottom bracket, you are crouched down, putting your face, head, and torso directly in the path of the bracket or cable if it releases. Spring work at least happens above the door where there is some distance. Bottom bracket work puts you in the worst possible position.
The failure mode is explosive. When a bottom bracket bolt is loosened while the cable is under tension, the bracket can launch across the garage like shrapnel. The cable, suddenly freed from its attachment point, whips through the air with tremendous force. Either the flying bracket or the snapping cable can cause catastrophic injuries including lacerations, broken bones, and worse.
There is no warning before release. When you begin loosening a bolt on a tensioned bottom bracket, the first few turns feel completely normal. Then, without any gradual buildup or warning, the remaining thread gives way and the stored energy releases instantaneously. There is zero chance to react.
Both sides are dangerous. Even if you are only working on one bracket, the other bracket is still under tension from its cable. Any work that shifts the door or changes the balance can affect both sides unpredictably.
SAFETY WARNING
The U.S. Consumer Product Safety Commission estimates approximately 20,000 to 30,000 garage door-related injuries occur annually in the United States. A significant portion of the most severe injuries involve cable and bracket failures during improper repair attempts. Bottom brackets should be treated with the same respect as loaded springs. Never work on bottom brackets, cables, or springs without professional training. Call (844) 971-3667 for safe, expert service.
Types of Bottom Brackets
Bottom brackets come in several configurations depending on your door type, manufacturer, and spring system:
Standard bottom fixture (most common). A single stamped steel bracket that combines the cable attachment point and the bottom roller spindle. This is what you will find on the majority of residential sectional garage doors. The cable attaches via a clevis pin or S-hook, and a roller spindle extends through a hole in the lower portion of the bracket.
Lift cable bottom bracket (commercial and heavy-duty). Found on heavier commercial or custom residential doors, these brackets are made from thicker gauge steel and may use bearing-type roller attachments instead of simple spindles. They handle significantly higher cable loads.
Bottom bracket with flag angle. Some doors use a bottom bracket that includes an integrated perpendicular flange (flag angle) to secure the bracket more firmly to the door panel. These are common on insulated doors and doors with reinforced bottom sections.
Extension spring bottom bracket. Doors with extension springs use a slightly different bottom bracket configuration. The pulley system attaches near the bottom bracket, and the cable routing differs from torsion spring systems. The tension dynamics are similar but the force angles change, which means these brackets experience different wear patterns.
Wind-loaded bottom bracket. In wind-prone areas of Utah like the Point of the Mountain corridor, canyon mouths, and open valleys, some doors use reinforced bottom brackets designed to handle the additional stress that wind places on door panels and tracks.
Regardless of type, all bottom brackets share the same fundamental characteristic: they are under constant cable tension and should never be worked on by anyone other than a trained professional.
PRO TIP
If you need to identify your bottom bracket type before calling for service, you can safely observe it without touching it. Note whether it is a single piece or has multiple components, whether the cable attaches via a pin, S-hook, or bolt, and whether the roller spindle is integrated or separate. Sharing this information with your technician can help them bring the correct replacement parts on the first visit.
How Bottom Brackets Work With Your Spring and Cable System
Understanding how bottom brackets fit into the larger garage door system helps explain why they are always under tension and why they fail.
The lifting cycle (torsion spring systems):
When you press your opener button, the motor pulls the door upward through the trolley and arm. But the opener alone does not lift the full weight. The torsion springs, mounted on the torsion bar above the door opening, store energy when the door is closed. As the door begins to rise, the springs unwind, transferring their stored energy through the torsion bar to the cable drums. The cable drums rotate, winding the lifting cables upward. Those cables, attached at their lower ends to the bottom brackets, pull the bottom of the door up.
This means at every point in the door’s travel, the bottom brackets are load-bearing. When the door is closed, the springs are fully wound and the cables are at maximum tension on the brackets. When the door is open, the springs are mostly unwound but the cables still maintain the door’s position.
The lifting cycle (extension spring systems):
With extension springs, the springs run along the horizontal tracks on either side. Steel cables run from the bottom brackets through pulleys near the track angle and connect to the springs. When the door opens, the springs stretch. When it closes, the springs contract. The bottom brackets serve the same critical role as the connection point where spring force meets the door.
For a complete explanation of how all these components interact, see our comprehensive guide to how a garage door works.
ACTION STEP
You can safely check your bottom brackets visually without touching them. With the door closed, look at both bottom corners where the cables attach. The cable should be taut and evenly seated on both sides. If one cable appears slack, if the bracket looks bent, or if you see rust or cracks, call (844) 971-3667 immediately. Do not attempt to adjust anything yourself.
Signs Your Bottom Bracket Needs Replacement
Bottom brackets are built to last, but they do not last forever. Utah’s harsh climate and daily use cycles take their toll. Here are the warning signs that your bracket needs professional attention:
| Warning Sign | What It Means | Urgency |
|---|---|---|
| Visible cracks in the bracket | Metal fatigue from repeated stress cycles. Bracket can fracture without warning. | Emergency |
| Bracket is bent or deformed | Impact damage, excessive tension, or metal fatigue. Cable alignment is affected. | High |
| Heavy rust or corrosion | Metal has weakened structurally. Load capacity is reduced. | High |
| Cable sits unevenly on the bracket | Bracket has shifted, cable pin is worn, or attachment hole has elongated. | High |
| Bottom roller dragging or sticking | Roller spindle on bracket is bent or worn, causing the door to bind in the track. | Moderate |
| Grinding or scraping at bottom of door | Bottom roller or bracket is misaligned relative to the track. | Moderate |
| Door appears crooked when moving | One bracket may be failing, causing uneven lifting force on the door. | High |
| Cable has jumped off the drum | Often caused by a loose or shifting bottom bracket that allows cable slack. | Emergency |
| Metallic popping or snapping from bottom corners | Bracket hardware loosening or bracket metal cracking under cyclic stress. | High |
| Bottom of door does not sit flush when closed | Bracket deformation or mounting hardware failure preventing proper door seating. | Moderate |
SAFETY WARNING
If you notice any emergency-level warning signs, stop using the door immediately. Do not attempt to open or close it with the opener or manually. A failing bottom bracket under cable tension can release without warning. Call Advanced Door at (844) 971-3667 for emergency service.
Many of these symptoms overlap with other issues like cable failure, crooked door problems, or off-track doors. A professional inspection can quickly determine whether the bottom bracket is the root cause.
Common Bottom Bracket Problems
Here are the most common issues that affect bottom brackets and what causes them:
1. Corrosion and rust. Bottom brackets sit at floor level where they face the worst of Utah’s environmental exposure: road salt tracked in on tires, snowmelt moisture, concrete moisture vapor, and in areas near the Great Salt Lake, salt aerosols in the air. Corrosion weakens the steel over time until it can no longer handle the cable tension safely. For more on rust prevention and repair, see our dedicated guide.
2. Metal fatigue and cracking. Every time your garage door cycles, the bottom bracket endures a full tension cycle. A typical residential door cycles 3 to 4 times per day, adding up to 1,000 to 1,500 cycles per year. Over 15 to 20 years, that is 15,000 to 30,000 stress cycles. Micro-cracks develop at stress concentration points (bolt holes, corners, the cable attachment point) and grow with each cycle until the bracket fractures.
3. Elongated cable attachment hole. The hole where the cable pin or S-hook attaches gradually wears from constant tension and micro-movements during each cycle. An elongated hole lets the cable shift position, creating uneven tension that can cause the cable to jump off the drum.
4. Bent or deformed bracket. Impact damage from a vehicle, heavy objects leaning against the door, an off-track event, or incorrect spring replacement with wrong specifications can bend a bottom bracket. A bent bracket misaligns the cable path and bottom roller.
5. Worn roller spindle. The integrated roller spindle on combination bottom fixtures wears over time, especially with steel rollers. A worn spindle causes the bottom roller to wobble, creating noise, friction, and accelerated track wear.
6. Loose mounting hardware. The bolts or rivets securing the bracket to the door panel loosen over time due to vibration, temperature cycling, and door flex. Loose hardware shifts the bracket position and changes the cable geometry, which puts abnormal stress on the cable, drum, and springs.
7. Cable pin or S-hook failure. The cable attachment hardware (pin, S-hook, or bolt) can corrode, bend, or break, especially in salt-heavy environments. When this hardware fails, the cable disconnects from the bracket, causing the door to drop on that side – similar to what happens during a cable snap.
UTAH NOTE
Utah homeowners along the Wasatch Front (Salt Lake City, Ogden, Provo, Layton, Bountiful) face accelerated bottom bracket corrosion from UDOT road salt. If you live on or near a main road that receives regular winter salt treatment, your bottom brackets may corrode 2 to 3 times faster than brackets in drier, more sheltered areas. Annual professional inspections are especially important in these zones.
Why You Should Never Attempt DIY Bottom Bracket Repair
We cannot stress this strongly enough: bottom bracket replacement is a job for trained professionals only. Here is why no amount of mechanical skill makes this a safe DIY project:
The springs must be fully unwound first. Before any bottom bracket work can begin, the torsion springs must be completely unwound to release all cable tension. Spring unwinding requires specialized winding bars and is itself one of the most dangerous garage door procedures.
Specialized tools are required. Professional technicians use C-clamps, locking pliers, and cable tension management tools to safely control the system during bracket replacement. These tools prevent uncontrolled cable release.
Cable management is critical. When the old bracket is removed, the cable must be controlled so it does not whip or tangle. Improper cable handling during bracket work creates a deadly whipping hazard.
Spring retensioning must be exact. After the new bracket is installed and the cable is reattached, the springs must be rewound to the exact correct tension for your door’s weight and size. Too much tension overloads the new bracket prematurely. Too little means the door will not balance properly.
Door balance must be verified. After any bracket replacement, the entire door balance must be tested and adjusted. An improperly balanced door will destroy the new bracket through uneven stress distribution.
SAFETY WARNING
The International Door Association (IDA) classifies bottom bracket replacement as a professional-only repair. Attempting this repair without proper training and tools can result in serious injury or death. Even experienced DIYers with mechanical backgrounds should never attempt bottom bracket, cable, or spring work. Call (844) 971-3667 for safe, professional service from technicians with the right training and equipment.
How a Professional Replaces a Bottom Bracket
Understanding the professional process helps you evaluate whether your service provider is following proper safety procedures and explains why bottom bracket replacement typically costs more than simpler repairs.
Step 1: Secure the door. The technician locks the door in the closed position using C-clamps or locking pliers on the track above a roller. This prevents the door from moving unexpectedly during the repair.
Step 2: Unwind the springs. Using specialized winding bars, the technician carefully unwinds the torsion springs to release all stored energy. This is the critical safety step that eliminates cable tension on the bottom brackets.
Step 3: Release cable tension. With the springs fully unwound, the technician loosens the set screws on the cable drum to release any remaining cable tension.
Step 4: Remove the cable from the bracket. The cable pin, S-hook, or bolt is removed, disconnecting the cable from the damaged bracket.
Step 5: Remove the old bracket. The mounting bolts or rivets securing the bracket to the door panel are removed, and the old bracket is taken off along with the bottom roller.
Step 6: Install the new bracket. A new bracket of the correct type, size, and gauge is secured to the door panel with proper hardware. A new bottom roller is installed on the bracket’s spindle.
Step 7: Reattach the cable. The cable is threaded through the new bracket and secured with a new cable pin or S-hook. The cable is properly seated on the cable drum with correct winding.
Step 8: Rewind the springs. The technician rewinds the torsion springs to the correct number of turns for the door’s weight and size, restoring proper lifting force.
Step 9: Test door balance. With the opener disconnected, the door is manually lifted to the halfway point for a balance test. If it stays in place, the balance is correct. If it drifts up or down, the spring tension is adjusted.
Step 10: Test full operation. The door is cycled several times with the opener connected to verify smooth, safe operation. Auto-reverse and safety sensor functions are tested to confirm proper safety compliance.
The entire process typically takes 45 to 90 minutes for a single bracket replacement, depending on the door type and condition of surrounding components. For more details on service timelines, see our guide on how long garage door repair takes.
PRO TIP
When scheduling bottom bracket replacement, ask your technician to inspect the cable, cable drum, and bottom roller at the same time. These components work as an integrated system, and replacing only the bracket when the cable or drum is also worn leads to repeat failures. Advanced Door inspects the complete system on every service call at no extra charge.
How Much Does Bottom Bracket Replacement Cost in Utah?
Bottom bracket replacement costs vary based on the bracket type, whether related components need attention, and whether it is a standard or emergency service call. Here is what Utah homeowners can expect to pay (industry-typical ranges):
| Service | Typical Cost Range |
|---|---|
| Single bottom bracket replacement | $75 – $175 |
| Both bottom brackets (pair) | $125 – $275 |
| Bottom bracket + cable replacement (one side) | $150 – $300 |
| Bottom bracket + cable + drum (one side) | $200 – $400 |
| Complete bottom hardware (both sides) | $350 – $650 |
| Bottom bracket + bottom roller replacement | $100 – $200 |
| Emergency or after-hours bracket service | $175 – $350+ |
| Bracket replacement during spring replacement (add-on) | $50 – $100 |
| Commercial bottom bracket replacement | $150 – $400+ |
| Full system service (brackets + cables + drums + springs) | $400 – $800+ |
These are industry-typical ranges for the Utah market. Your actual cost depends on door type, bracket style, accessibility, and whether additional components need replacement. For a broader view of repair costs, see our complete garage door repair cost guide.
ACTION STEP
When getting estimates for bottom bracket replacement, always ask whether the quote includes the bracket hardware, labor, spring unwinding and rewinding, and a full system inspection. Some companies quote bracket-only pricing and then add fees for cable reattachment, spring winding, and balance testing. At Advanced Door, our estimates include the complete job with no hidden fees. Call (844) 971-3667 for a free estimate.
Bottom Bracket Materials and Quality Differences
Not all bottom brackets are created equal. The material, gauge, and manufacturing quality directly affect how long your bracket will last and how much stress it can handle.
Standard stamped steel (most common). The majority of residential bottom brackets are stamped from 14-gauge or 12-gauge galvanized steel. These are adequate for standard doors weighing 100 to 200 pounds. Galvanization provides basic corrosion resistance but eventually breaks down in harsh environments.
Heavy-gauge steel (premium). Higher-quality bottom brackets use 11-gauge or 10-gauge steel, providing significantly more strength and fatigue resistance. These are recommended for heavier doors, insulated doors, and homes where the door cycles more frequently than average.
Commercial-grade (industrial). Commercial bottom brackets may use 7-gauge steel or thicker, with reinforced cable attachment points and heavy-duty roller hardware. These are designed for doors that cycle 25,000 or more times per year.
Finish types matter too:
- Galvanized: Standard corrosion protection. Eventually wears through in salt environments. Adequate for most Utah homes.
- Powder-coated: Better corrosion resistance and more durable finish. Recommended for homes near salted roads or the Great Salt Lake.
- Raw steel: No corrosion protection whatsoever. Will rust quickly in any Utah environment. Avoid.
PRO TIP
When having brackets replaced, ask about upgrading to heavier-gauge brackets, especially if your current brackets failed due to corrosion or fatigue. The cost difference between standard and heavy-duty brackets is typically $10 to $25 per bracket, but the lifespan improvement can be substantial. Advanced Door uses heavy-duty brackets on all installations because the small cost increase is worth the significant improvement in longevity and safety.
How Utah’s Climate Affects Your Bottom Brackets
Utah’s diverse and extreme climate creates specific challenges for bottom brackets that homeowners in milder regions do not face.
Road salt corrosion (Wasatch Front). UDOT applies hundreds of thousands of tons of road salt annually across Utah highways. That salt gets tracked into garages on vehicle tires and undercarriages. Bottom brackets, sitting at floor level, are directly in the splash zone of every vehicle entering or leaving the garage. Over years, this exposure corrodes galvanized coatings and attacks the base steel underneath.
Temperature extremes. Utah’s temperature range, from below zero in Cache Valley winters to above 100 degrees in St. George summers, creates constant thermal cycling in metal components. This repeated expansion and contraction accelerates metal fatigue at stress concentration points like bolt holes and cable attachment points.
Great Salt Lake aerosols. Homeowners in Davis, Weber, Box Elder, and Tooele counties face microscopic salt particles from the Great Salt Lake that settle on metal surfaces and accelerate corrosion even in well-sealed garages. Bottom brackets in these areas may corrode 2 to 3 times faster than those in Utah County or Cache Valley.
Concrete moisture vapor. Utah’s dry climate means garage floors often emit moisture vapor as the concrete breathes. This moisture condenses on cold metal components, creating a persistent corrosion-friendly environment at the bottom bracket’s exact location.
Canyon wind stress. Homes near canyon mouths (Provo Canyon, Ogden Canyon, Big Cottonwood, Little Cottonwood, Logan Canyon) experience strong wind events that flex garage doors and add cyclic stress to bottom brackets beyond normal operational wear.
Dust and construction debris. Utah’s ongoing construction boom and naturally dusty environment introduce abrasive particles that contaminate bracket hardware and wear roller spindles, accelerating mechanical deterioration.
UTAH NOTE
For Utah homes in high-corrosion zones (within 5 miles of the Great Salt Lake, on heavily salted roads, or near canyon mouths), we recommend annual professional bottom bracket inspections. These environments can reduce bracket lifespan by 30 to 50 percent compared to sheltered locations. Call (844) 971-3667 to schedule a comprehensive garage door inspection that covers brackets, cables, drums, springs, and all hardware.
When a Bad Bracket Means Bigger Problems
A failing bottom bracket rarely fails in isolation. Because the bracket is the connection point between the cable system and the door, bracket problems often indicate or cause damage in connected components:
Cable damage. A corroded or cracked bracket creates a rough surface that abrades the cable, weakening individual strands. If your bracket shows wear, your cable likely has hidden damage that could lead to a sudden snap.
Cable drum issues. When a bracket shifts or deforms, the cable angle changes, causing the cable to wind unevenly on the drum. This can lead to the cable jumping off the drum, which is an emergency situation.
Spring stress. A bent bracket changes the effective cable length, which alters the spring tension geometry. This puts abnormal stress on the springs and can accelerate spring failure.
Track and roller problems. The bottom roller rides in the track, and its spindle is part of the bottom bracket. A deformed bracket misaligns the roller, causing track wear, binding, and potential off-track events.
Panel damage. A bracket under abnormal stress can deform or crack the bottom door panel at the mounting points. If panel damage is severe enough, the panel itself may need replacement.
This is why professional technicians inspect the entire bottom system (brackets, cables, drums, rollers, and panels) whenever any single component shows problems. See our guide on why garage doors fail for more on how component failures cascade through the system.
Preventive Maintenance and Inspection Tips
While you should never attempt to repair bottom brackets yourself, there are safe inspection practices you can perform regularly to catch problems early.
Visual inspection (monthly, safe from a distance):
- Look at both bottom brackets with the door closed
- Check for visible rust, cracks, or bending
- Verify the cable is taut and properly seated on both sides
- Look for any gaps between the bracket and the door panel
- Listen for unusual sounds from the bottom of the door during operation
Bottom roller check (quarterly):
- Listen for grinding, squeaking, or clicking from the bottom rollers
- Look for black residue around the bottom track (worn roller debris)
- Note if the door hesitates or binds at the bottom of its travel
Professional inspection (annually). Have a trained technician check bracket integrity, cable condition, and roller wear during your annual garage door maintenance visit. Professional inspections include testing components under controlled conditions that are not safe to replicate as a homeowner.
ACTION STEP
Add bottom bracket inspection to your seasonal maintenance routine. Every time you inspect your door (at least twice per year), spend 30 seconds looking at both bottom brackets. You are looking for anything different from last time: new rust, bending, cable slack, or unusual sounds. If anything changes, call (844) 971-3667 before the problem escalates. Early detection prevents emergency failures.
7 Common Mistakes Homeowners Make About Bottom Brackets
1. Attempting to unbolt a bracket without unwinding springs. This is the most dangerous mistake possible. The bracket is under hundreds of pounds of tension. Removing bolts without releasing spring tension first can cause the bracket to launch like a projectile or the cable to whip violently.
2. Ignoring rust because “it is just cosmetic.” Rust on a bottom bracket is never just cosmetic. Any visible rust means the bracket’s structural integrity is compromised. Corrosion weakens steel from the inside out, and the actual damage is always worse than what you can see on the surface.
3. Replacing only one bracket when both are worn. Bottom brackets age at roughly the same rate because they handle equal loads. If one bracket has failed or shows significant wear, the other is likely close behind. Replacing both is more cost-effective than two separate service calls.
4. Using the wrong bracket type or gauge. Bracket specifications matter. A bracket rated for a lightweight single-car door should not be used on a heavy insulated double-car door. Undersized brackets fail prematurely and can fail dangerously under excessive load.
5. Not replacing the cable when replacing the bracket. If a bracket has been corroded or deformed, the cable has been running on a compromised surface and likely has hidden strand damage. A new bracket with a damaged cable is a setup for cable failure.
6. Lubricating the bracket instead of replacing it. Lubricant does not fix cracks, corrosion, or metal fatigue. Some homeowners spray lubricant on rusty brackets thinking it will solve the problem. Lubrication is for rollers, hinges, and springs, not for load-bearing structural brackets.
7. Hiring an unqualified handyman for bracket work. Bottom bracket replacement requires specific training in spring tension management, cable handling, and door balancing. A general handyman may not have the specialized tools or knowledge. Always hire a dedicated garage door professional for any work involving brackets, cables, or springs.
When to Call a Pro
Call a professional garage door technician immediately if you notice any of the following:
- Any visible crack, break, or deformation in a bottom bracket
- Cable slack or a cable that has jumped off the cable drum
- The door is crooked, uneven, or making unusual noises at the bottom
- Significant rust or corrosion on either bottom bracket
- The bottom roller is not rolling smoothly in the track
- The door slams down instead of lowering smoothly
- Any metallic popping, snapping, or grinding sounds from the bottom corners
- You notice the bottom of the door no longer sits flush against the floor
Bottom bracket problems get worse, never better. A bracket with a small crack today can fracture completely tomorrow, potentially dropping the full weight of the door and creating a serious safety hazard for your family.
For fast, professional bottom bracket service anywhere in Utah, call Advanced Door at (844) 971-3667. We offer free estimates, same-day service, and our exclusive lifetime warranty on parts and labor.
Get a Free Estimate from Advanced Door
Expert bottom bracket replacement with proper spring tension management and full safety protocols
Serving Ogden, Salt Lake City, Provo, Park City, Logan, and all of Utah
Call for a free estimate. No pressure, no hidden fees.
Current offers: $100 off any new door or 10% off any service call
(Offers cannot be combined)
Frequently Asked Questions
What is a garage door bottom bracket?
A bottom bracket (also called a bottom fixture) is the heavy-gauge steel component mounted to the bottom corners of your garage door where the lifting cables attach. Most residential bottom brackets also hold the bottom roller that rides in the track. The bracket serves as the critical connection point between your spring and cable system and the door itself, carrying hundreds of pounds of tension at all times.
How long do garage door bottom brackets last?
Standard galvanized bottom brackets typically last 15 to 25 years under normal use in moderate environments. However, in Utah’s harsh conditions (road salt, temperature extremes, Great Salt Lake aerosols), brackets may last only 10 to 15 years. Heavy-gauge brackets and powder-coated finishes last longer. See our parts lifespan guide for a complete component lifespan ranking.
Can I replace a garage door bottom bracket myself?
No. Bottom bracket replacement requires fully unwinding the torsion springs to release cable tension, which is one of the most dangerous garage door procedures. Attempting to remove a bottom bracket while the cable is under tension can cause the bracket to launch like shrapnel or the cable to whip violently. This is strictly a professional repair.
How much does bottom bracket replacement cost?
A single bottom bracket replacement typically costs $75 to $175 in the Utah market. Replacing both brackets runs $125 to $275. If the cable or cable drum also needs replacement, the total can reach $200 to $400 per side. Call (844) 971-3667 for a free estimate specific to your door.
How do I know if my bottom bracket is bad?
Warning signs include visible cracks or bending in the bracket, significant rust or corrosion, the cable sitting unevenly, metallic popping or snapping sounds from the bottom corners, the door appearing crooked during operation, or the bottom of the door not sitting flush when closed. If you notice any of these signs, stop using the door and call a professional.
Does a broken bottom bracket mean I need a new garage door?
Almost never. Bottom brackets are replaceable components that cost far less than a new door. However, if the bracket failure has damaged the bottom door panel at the mounting points, you may need a panel replacement in addition to the bracket. A technician can assess the full scope of damage during an inspection.
Why does my bottom bracket keep rusting?
Bottom brackets rust faster than other components because they sit at floor level where they are exposed to road salt tracked in on tires, snowmelt moisture, concrete moisture vapor, and in some parts of Utah, Great Salt Lake salt aerosols. If your brackets are rusting prematurely, consider upgrading to powder-coated or heavy-gauge galvanized brackets and addressing garage door sealing to reduce moisture exposure.
Should I replace both bottom brackets at the same time?
Yes, in most cases. Both brackets handle equal loads and age at roughly the same rate. If one bracket has failed or shows significant wear, the other is likely close behind. Replacing both during a single service call is more cost-effective than scheduling two separate visits, and it ensures even cable tension on both sides of the door.